Walkthrough

Product flow

Step-by-step walkthrough of the product's main features and user flow.

Step 1

Setup the elements and configure the extraction

Use the setup guide to deploy new or select existing elements. You will need a lakehouse, Spark environment and two extraction notebooks.

  • Select or create a Lakehouse. Any existing lakehouse in the workspace of the Lineage Workbench can be used, or you can let the wizard create a new one.
  • Select or create an Environment. This environment ensures that Semantic Link and Semantic Link Labs libraries are available inside the notebooks.
  • Deploy the extraction notebooks. These notebooks contain the extraction logic for your data sources.
  • Choose workspaces and elements to extract. The elements can be scattered across multiple workspaces. The info will be given to the extraction notebooks via parameters.
  • (Optional) Configure Azure OpenAI Configuration. You can setup the necessary keys and endpoints for integration of AI description functions. You need to setup the OpenAI models via Azure Foundry in your own Azure portal. For more information, see Azure OpenAI documentation.
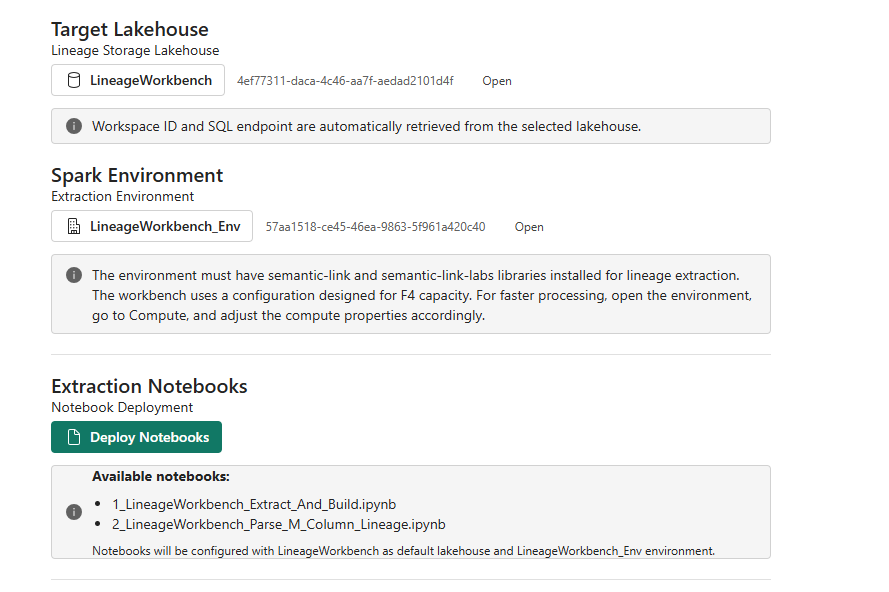
Setup and Configuration
Use the assistant to easily setup the lineage workbench configuration

Step 2

Start the initial extraction

  • (Optional) Change the environment to better suit your capacities. The default settings assume a Fabric F4 capacity, but you can speed up extraction processes by changing the settings in the environment configuration to your capacity.
  • If you haven't done so, select the necessary artifacts to extract.
  • In the configuration view, start the Notebooks. Only Notebook 1 is necessary for the initial extraction and usage of the lineage workbench, all following notebooks just give more information.
  • After the extraction is complete, you may have to wait a few minutes, so the Lakehouse SQL endpoint gets synched to the lakehouse.
  • (Optional) You can use Fabric resources to schedule the extraction notebooks per your own preference.
Setup and Configuration
Start the first extraction of your metadata

Step 3

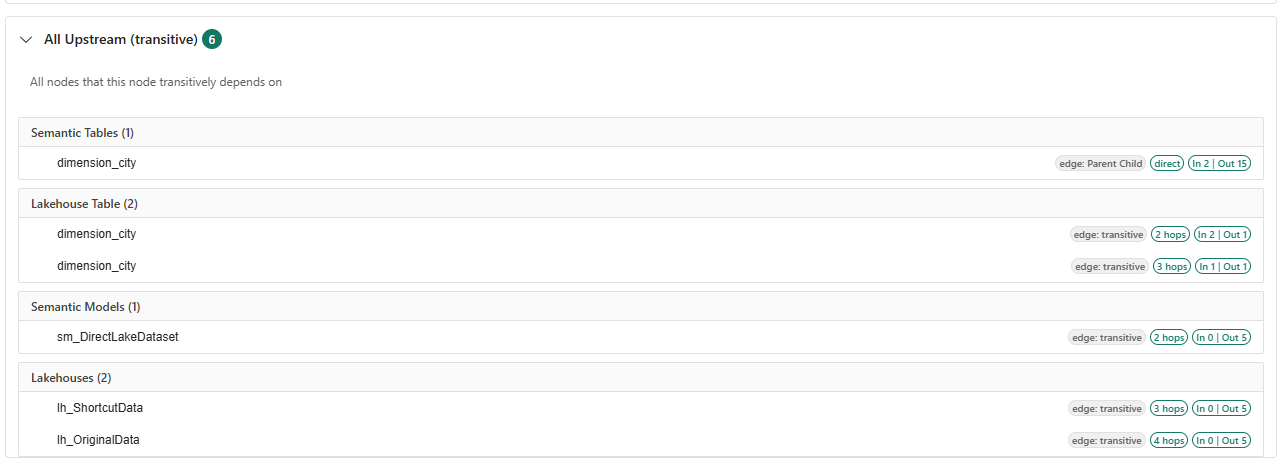
Inspect related nodes in detail and graph views

  • Check upstream data to find the sources feeding into the selected node.
  • Inspect downstream data, so you can understand the impact on subsequent nodes and avoid potential issues.
  • Adjust depth and direction controls to refine the view.
Upstream Data
Upstream Data
Downstream Data
Downstream Data

Step 4

Review queries and DAX calculations

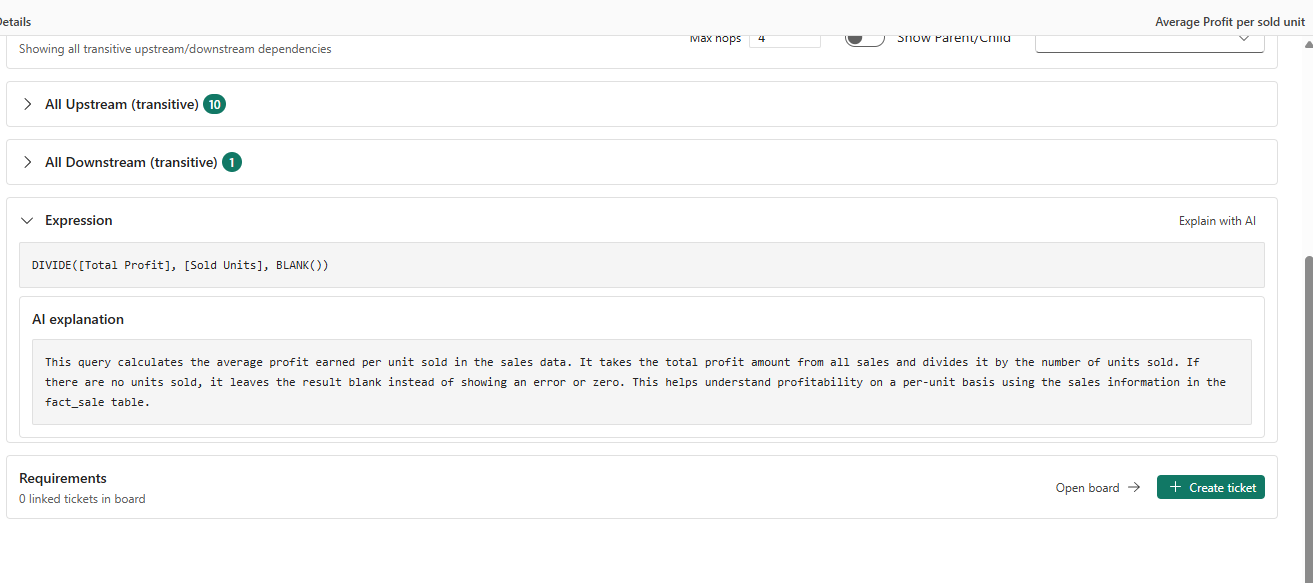
  • See M queries and DAX calculations for the selected nodes without opening the data model.
  • Let AI explain the queries and calculations.
AI Explanation
Measure expression and AI explaination

Step 5

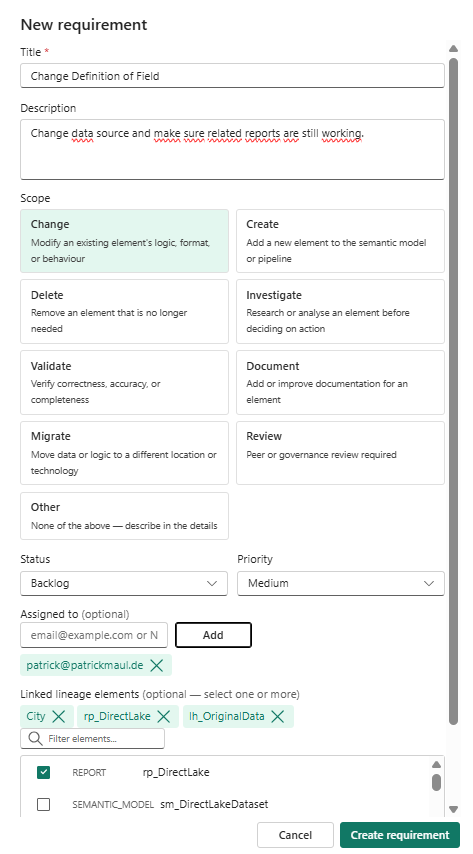
Manage requirement tickets

  • Create and edit tickets inside the integrated board.
  • Link tickets to lineage nodes for impact-aware planning.
  • Track progress with Kanban columns from Backlog to Done.
Requirements Board
Create Requirements inside the workbench